Introduction: In the 1950s and 1960s, the ocean floor was explored and mapped with new techniques and instruments. New discoveries helped explain how the continents had moved over millions of years. Sea floor spreading is the process in which the ocean floor on each side of a rift valley is pushed away by lava erupting from the mantle beneath the Earth’s crust. The lava hardens to form a new ocean floor. The old ocean floor is pushed away from the rift valley on both sides. Evidence from the mid-ocean ridges shows a symmetric pattern of changes in magnetic orientation. These changes correlate with the periodic reversals in the Earth’s magnetic field. In this activity, students will explore some of the evidence which led to the discovery of sea floor spreading.
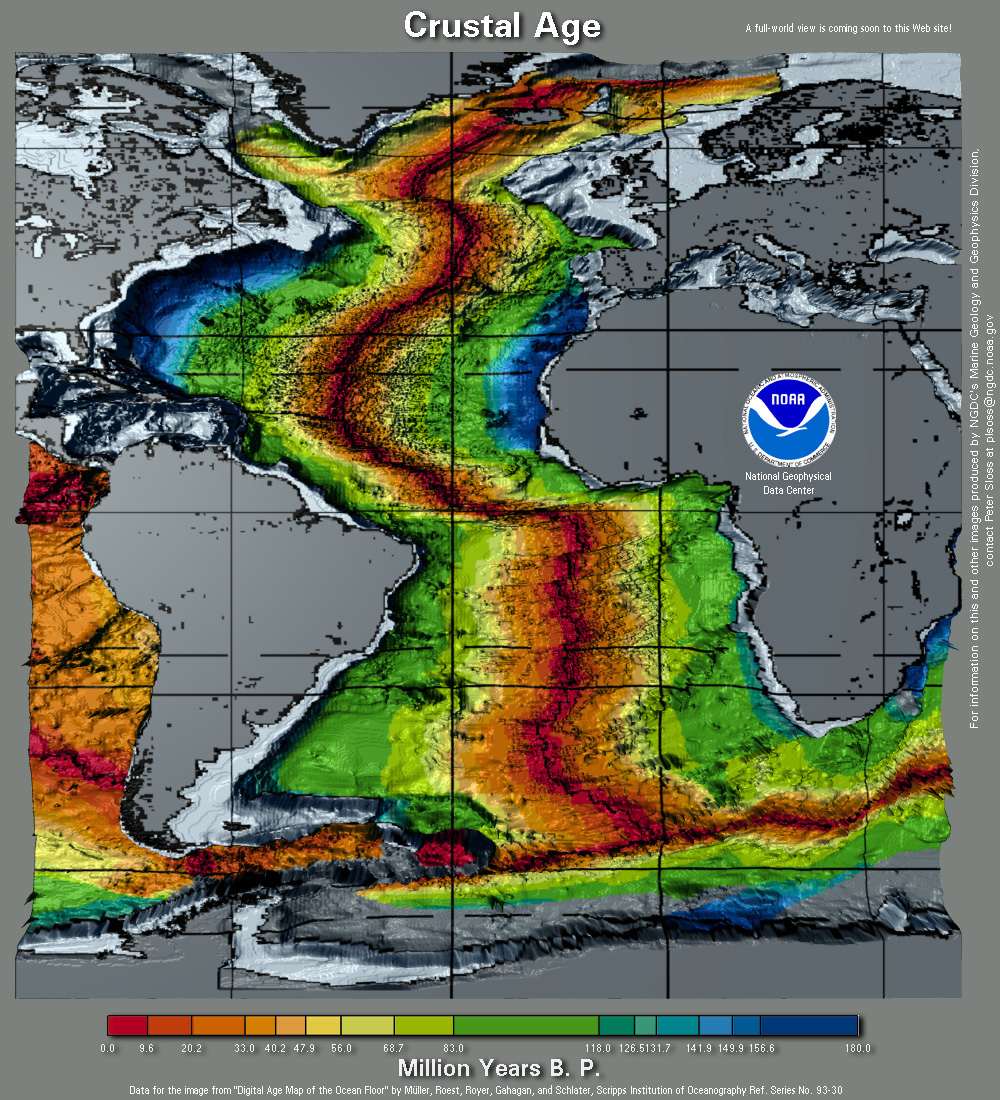
What to Expect: Although set-up for this activity is time-consuming, the boards will be useful for many classes. Students should have an introduction to plate movements and crustal processes before working on this activity. Sea floor spreading info is available at NGDC Images and NGDC Crustal Age.
Materials:
- Sea floor spreading model – cardboard, construction paper, at least 12 bar magnets, tape
- Compass (which acts as a magnetometer)
- Adding machine tape
- Pencil
Procedure:
Teacher Preparation
- Prepare 4 to 6 models of the sea floor depending on available materials. For a model, obtain two pieces of large cardboard or posterboard.
- Lay one board on a desk top and arrange 12 or more bar magnets in a symmetrical pattern (see diagrams below).
- Tape the magnets to the bottom board.
- Place construction paper or a second board on top of the board with the taped magnets and tape around the edges with masking tape so students cannot see what is inside. It is helpful to mark intervals where the students should take compass readings.

Student Procedure
- Place the strip of adding machine tape over the center of the sea floor model.
- Slowly move a compass across the adding machine tape. At each marked interval on the model, take a compass reading.
- At each interval, draw an arrow on the adding machine tape to indicate the direction of the Earth’s magnetic field when rocks at that location cooled and hardened.
- Locate the area where the mid-ocean ridge would be located and mark the ridge on your adding machine tape.
- On the smaller scale tape below, draw the pattern as seen on your adding machine tape. Also indicate where you think the youngest and oldest rocks would be.
- Use your tape to diagram your evidence and to answer the conclusion questions:
Describe the pattern you observed on the sea floor.
Why did the compass needle change direction? Why does this pattern appear as a magnetometer is taken across the Atlantic Ocean?
How does this pattern and the location of the youngest rocks provide evidence for sea floor spreading?
Evaluation:
Student’s renditions of the magnetic pattern
Written answers to questions
Extensions:
Students could construct diagrams of mid-ocean ridges, shown in cross-section and from above.
Have students locate ocean ridge systems on a relief globe or relief world map. Where are oceans expanding? Where are plates subducting?
Julie Lambert, SEA Experience 1990. Copyright 1998-2008 by Sea Education Association, all rights reserved. Compiled and edited by Pat Harcourt & Bill Meyer.
This project was supported, in part, by the National Science Foundation (Proposals # TEI-8652383, TPE-8955214, and ESI-925324), the Henry L. and Grace Doherty Foundation, the Donner Foundation and the Pew Charitable Trusts. Opinions, findings, conclusions or recommendations expressed are those of the authors and not necessarily of the Foundations.


